
Yes, you heard it! The luxury of a patio surface right out on your second, third, or even rooftop deck. No more splinters for us!
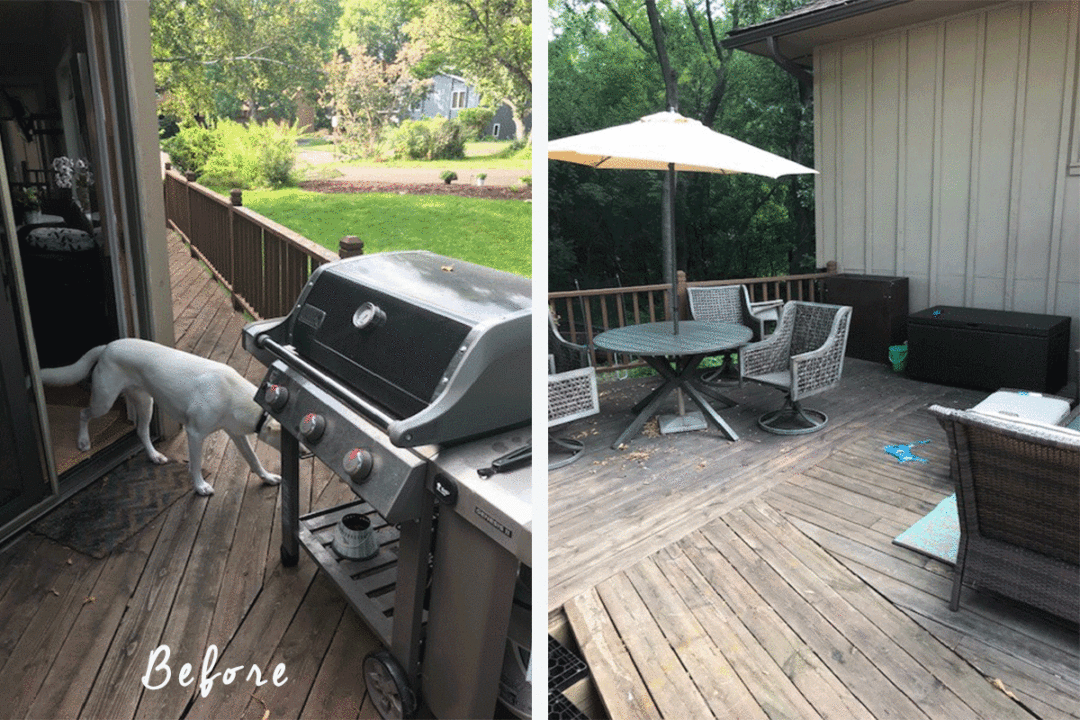
We decided to give this a try! Below is a before photo of our deck with existing (patched) together cedar wood. The previous homeowners installed this deck in the 1970’s and had been added on to several times. The angles of this deck are unique because it’s close to the property line. So, laying and cutting the porcelain tile was much more of a jigsaw puzzle than we thought.
Tip #1: Rent a large “high quality” tile saw. We made the mistake of using our generic one that we have used for bathroom tile cutting and it worked ok, but some of the cuts were trickier due to the porcelain size that we chose for this project.
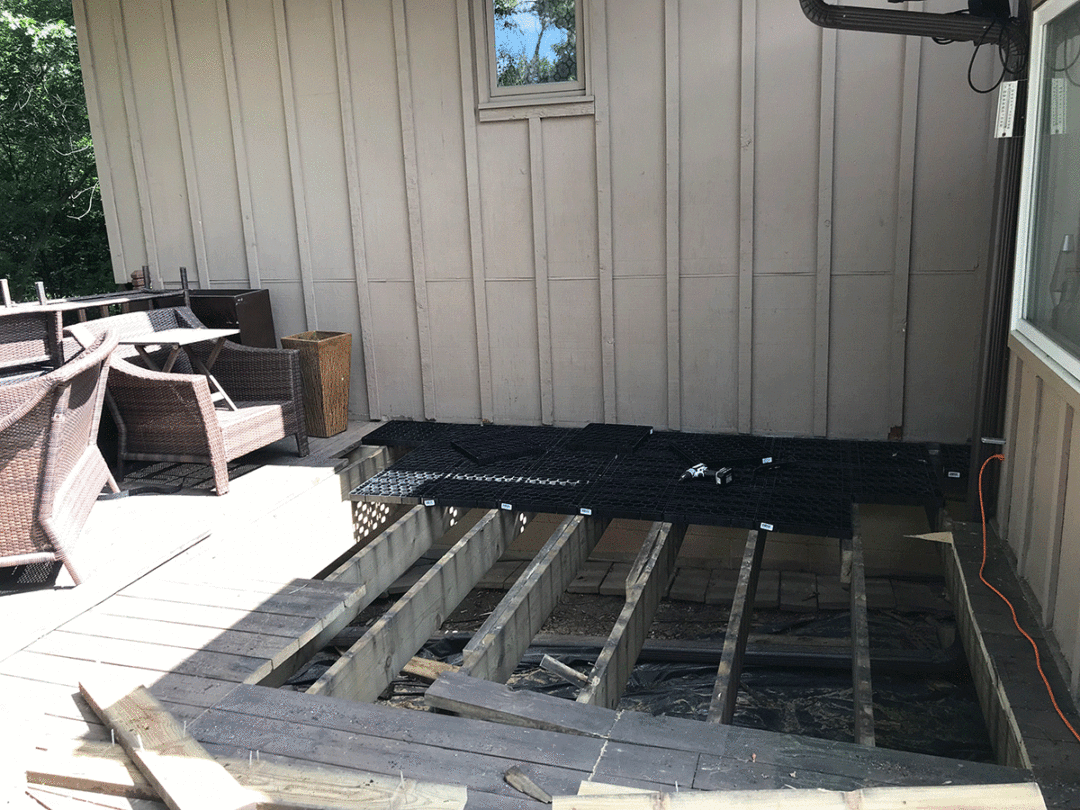
Tip #2: Distinguish if your joist boards are still in good shape. We lucked out and ours were still in great shape (unlike the top boards).
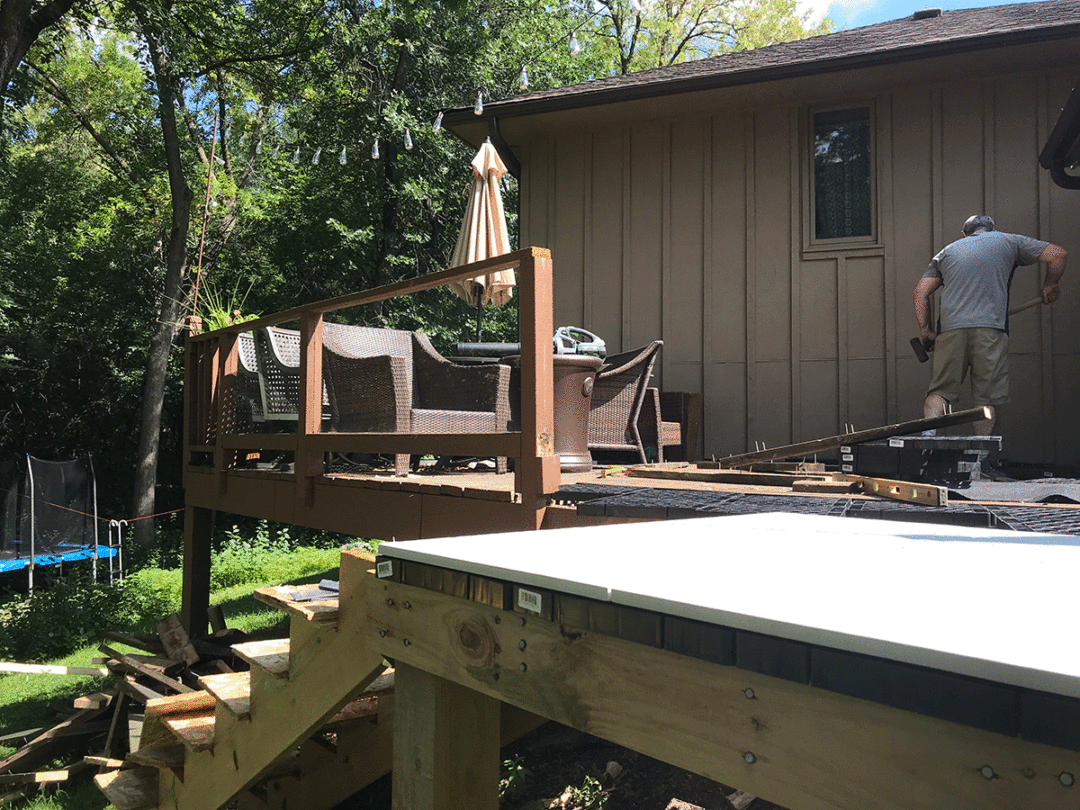
There is probably a much smoother way to deconstruct and reconstruct this deck, but we were amateurs. We needed to add steps off the deck to access our backyard. Here’s an angle with a portion of the silica grid system installed and porcelain laid on top, along with a new staircase going in!
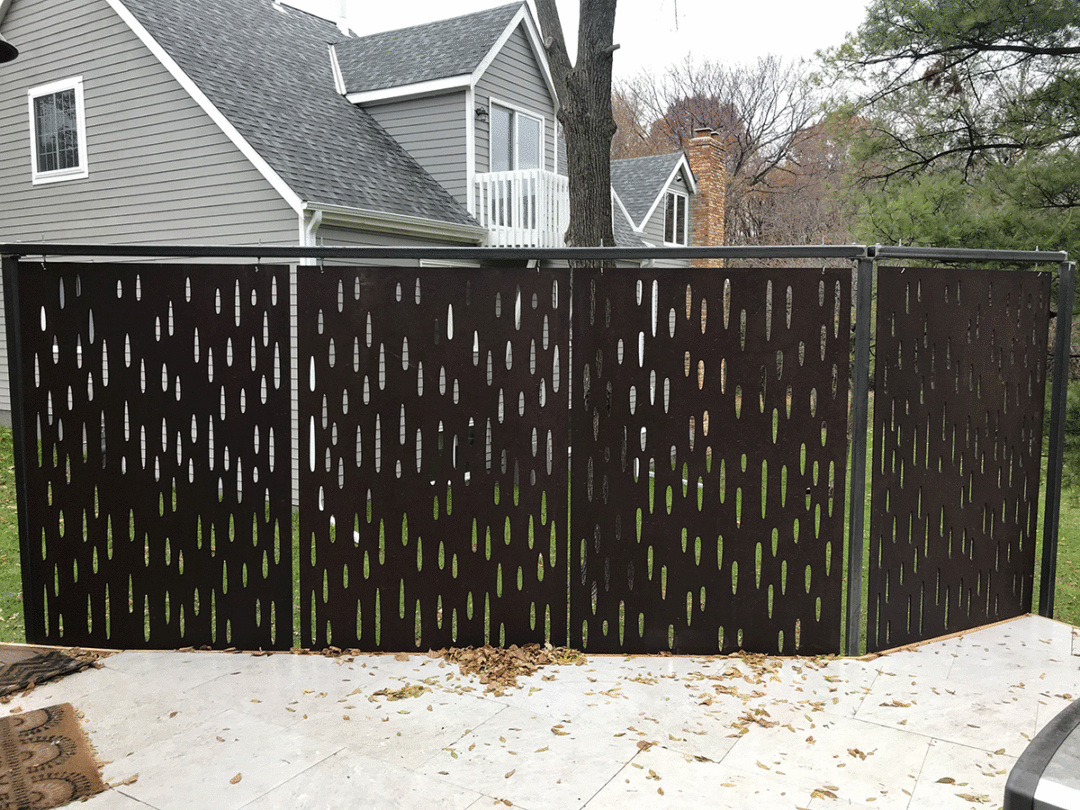
Since our deck sat at an angle and part of it faced the neighbors, we wanted to create more privacy. We worked with MetalSmith’s, a local welding company, and used OutDeco Panels (style: Monsoon) to create a back drop and privacy.
Next up, planned to install an outdoor kitchen with Open Air Cabinetry in front of these panels.
Tip #3: Fully secure the OutDeco panels. We made the mistake of having them swinging from the top hooks which wasn’t a huge problem until the winds came up and started banging against the side of the deck
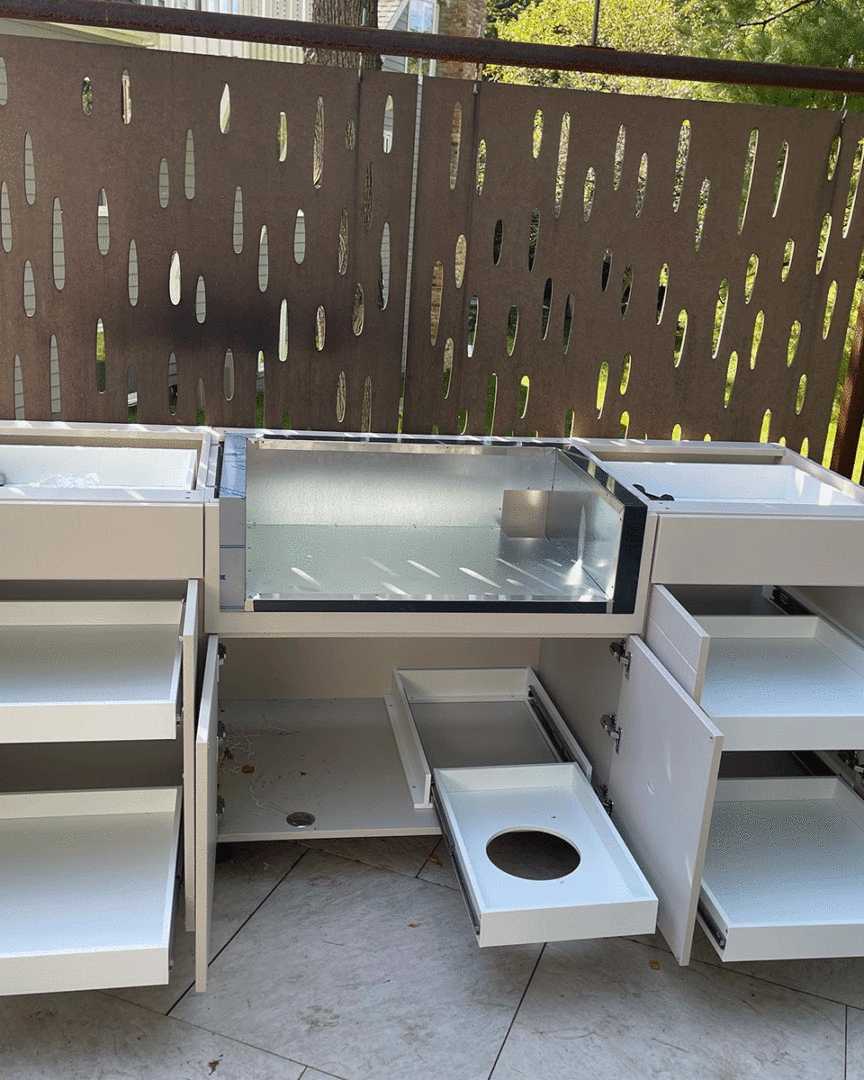
Tip #4: Use a level when installing your Open Air Cabinetry. It may sound like a silly tip, but they do make it easy with self leveling feet.
Tip #5: Make sure you have the correct dimensions of the insulation jacket. The cabinet maker needs the correct sizes to cut the opening for the grill to slide into.
When we first installed this Open Air Cabinetry we were using a propane tank, so we opted for the sliding shelf to set it on. Now a couple years later we had a gas line ran from the house, so we never have to change the propane tank again!
The Open Air door style and color we went with was: Cape Cod in Glacier Gray
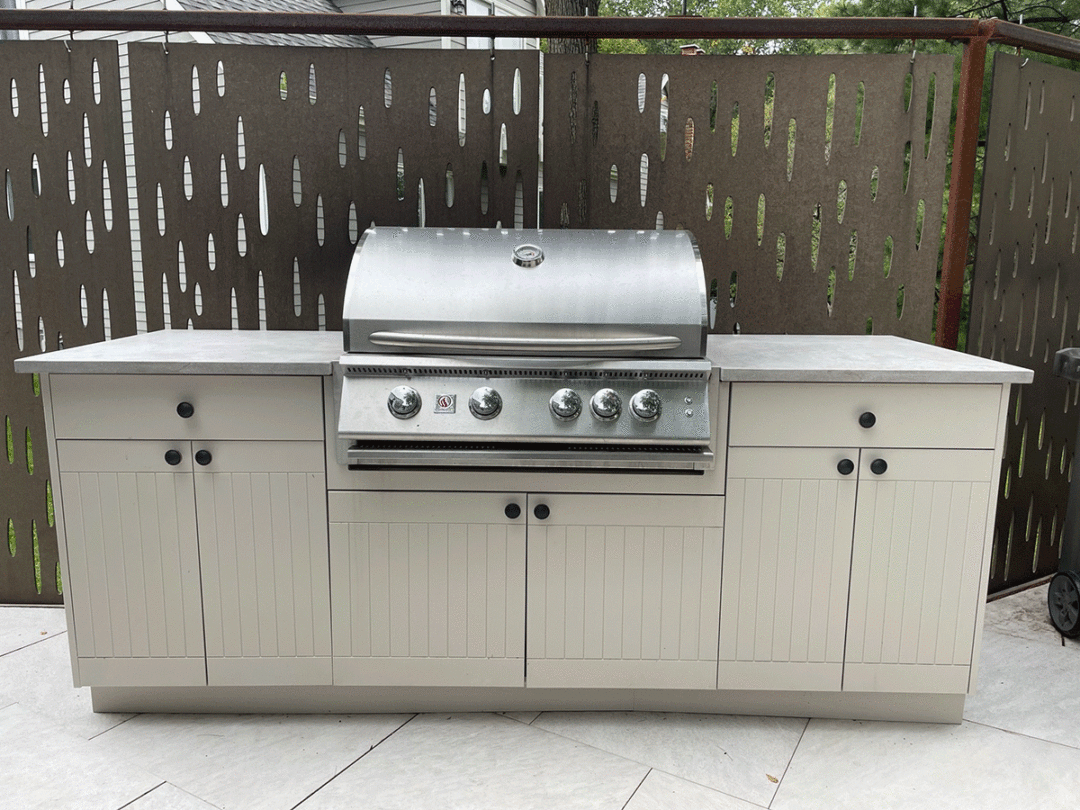
Tip #6: Have the countertop installers add a drip edge. We did not do that and it would have been worth it! After a rain or snow storm the drip edge helps prevent moisture from entering the cabinetry. Since it was our first counter top we should of had the counter top company come out and measure for us. We choose a natural unfinished limestone from a local stone company call, Orijin Stone.

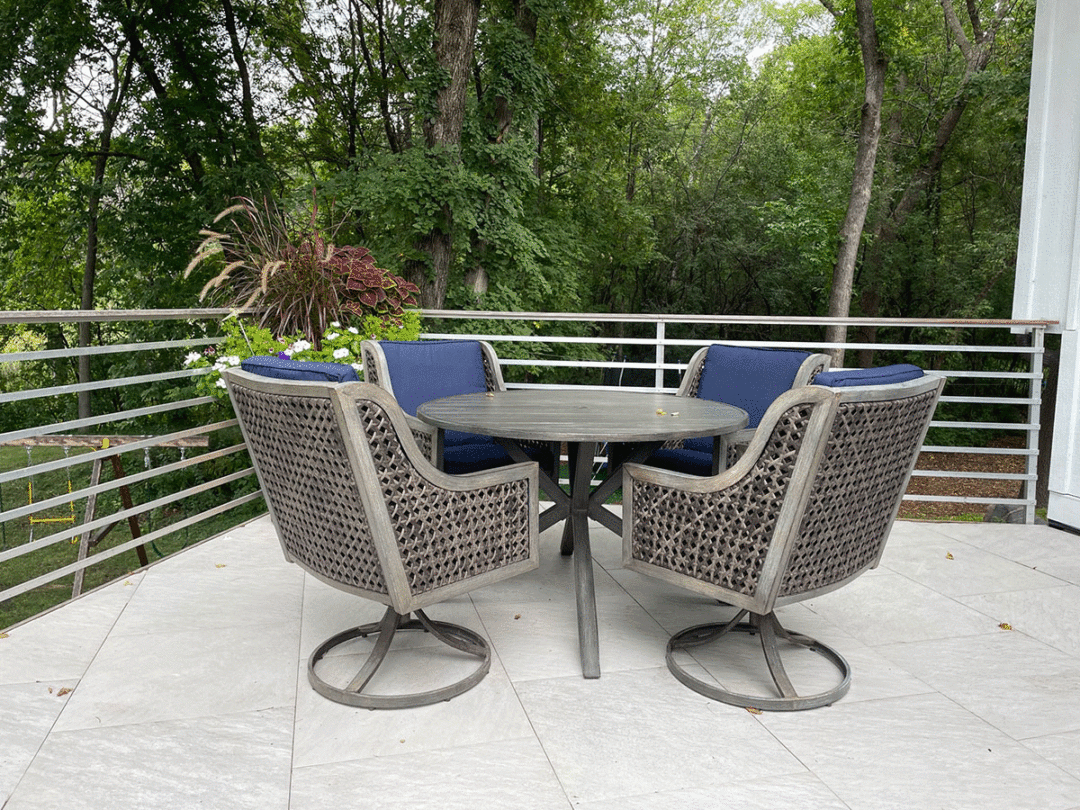
Here are completed photos of the raised porcelain deck using the silica grid system (Daltile) supports and Open Air Cabinetry. Details and privacy we created out of metal supports and OutDeco panels. Now, I can’t wait to update it with new outdoor furniture. It is feeling a little monochromatic, which isn’t always bad, but we need a pop of color!
We love having family dinners out here now! It feels so much more like us. We are so lucky to have found this beautiful wooded lot overlooking wetlands in 2016. It’s been an ongoing project, but that’s all the fun of putting your own personality into your home!
I hope this was somewhat helpful! Here is the list of why we love it so much:
#1: No more splinters
#2: Porcelain doesn’t get hot in the summer
#3: It looks so crisp and clean (once its power washed)
#4: It gives our deck an elevated look
Thanks for Reading! Peter is always a phone call away if you have any questions about any of our products!